Photoshop Passport Photo Template: 3 Easy Steps
June 14, 2024
2 min read
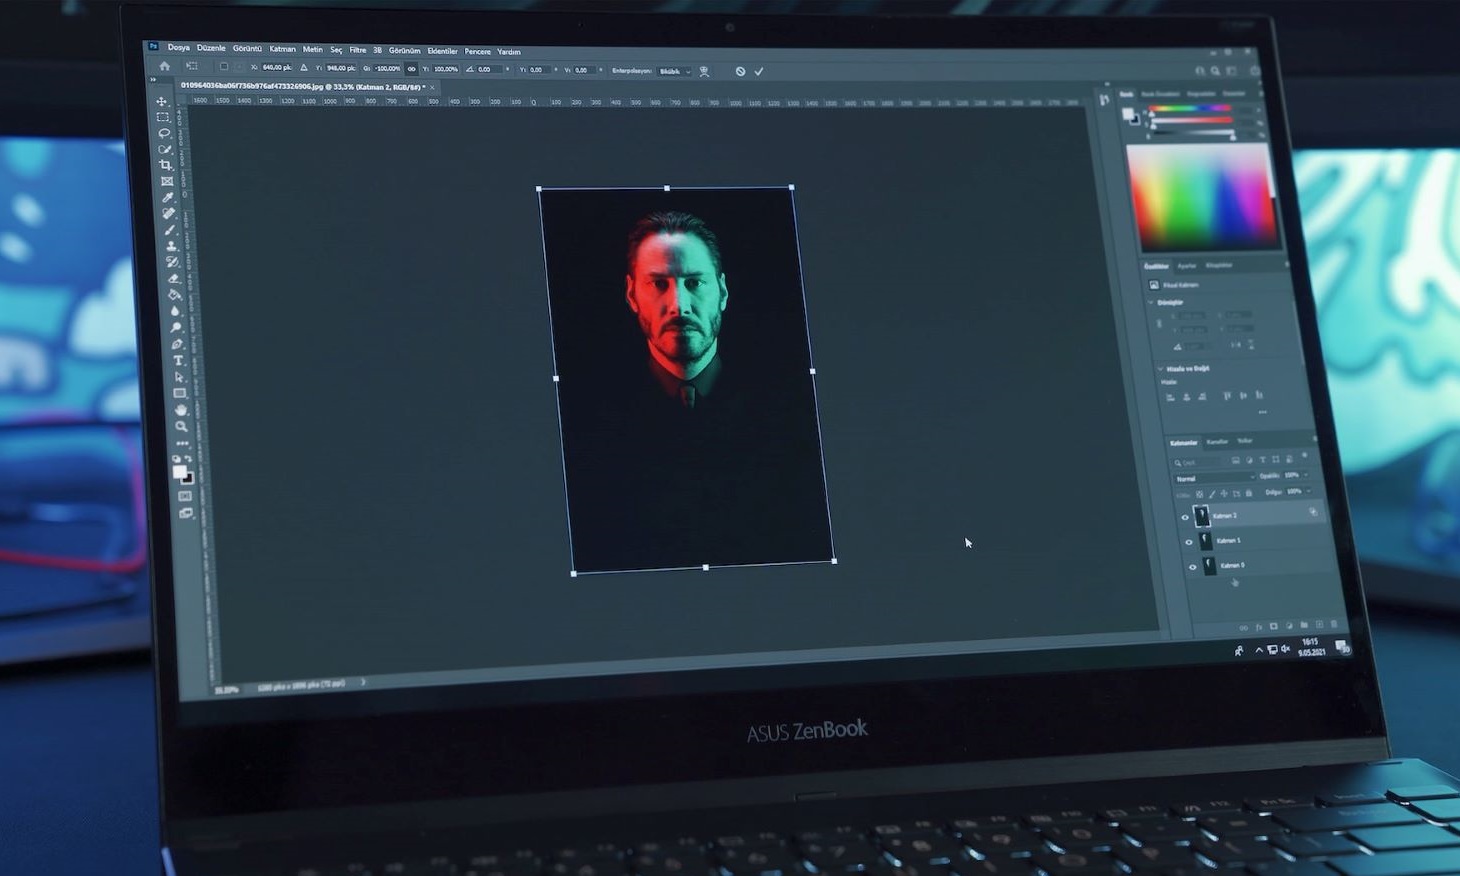
It might be challenging to get a valid passport photo so that it complies with the official US standards. In this article, we’ll walk you through the easy steps to get a perfect Photoshop passport photo template. Then you can use it as it is or print it at any store.
In Focus
Photoshop passport photo template v1.1
If you want to use the software program for professional purposes to edit passport photos in Photoshop, the Photoshop Passport Photo Template v1.1 is for you. The license will cost around $20. You can follow the link to get the program version here www.nicmyers.com/photoshop-passport-template-v1/. However, consider another handy option first.
To save money and time, get a passport photo done online now with our quick and compliant service. Without leaving your place. The photos you receive will be accepted by the passport office. This way you don’t need to travel to get a Walgreens passport photo, or passport picture in a pharmacy, photo studio, or any other store. Always remember you’ve got that option too.
Take a passport photo for Photoshop template according to official guidelines
It won’t matter how professionally you nail the task in Adobe Photoshop: create, size, and get the plain white background, if your passport photo has mistakes. The photo taken with mistakes will be rejected by the passport office.
According to the US Department of State, the passport photo (done in Photoshop or any other way), must meet the following rules and follow the guidelines. Your photo must be of high resolution, the right size of 2×2 inches or 51×51 mm, head between 1 and 1 3/8 inches from the forehead to the chin, no-tilt position, eyes open looking directly at the camera. Hats, glasses, and earphones are not allowed in a passport photo done with Photoshop, in a store, online tool, or any other way. The photo must be recent, not more than 6 months old, which is why a photo from a few years ago won’t do a good job for the Adobe Photoshop passport template.
Create a passport photo in Adobe Photoshop in 3 easy steps
Below you’ll find the simple instructions without fluff or purchase on creating passport photos in Photoshop for free download.
Step 1. Crop passport-photo-to-be in Photoshop
Install the latest version of Adobe Photoshop on your computer, 2022 or 2023 will be fine.
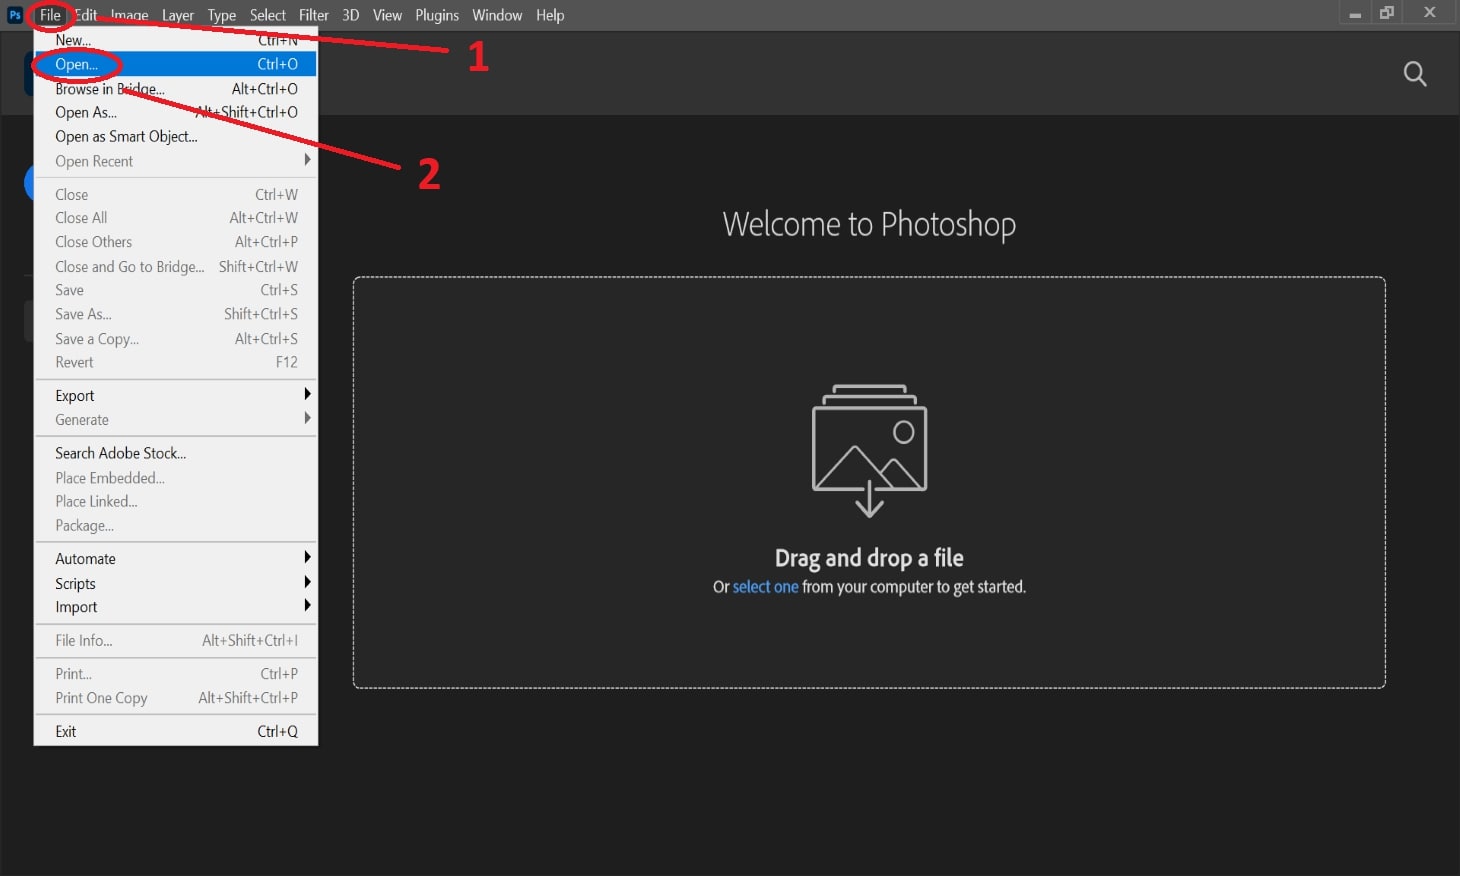
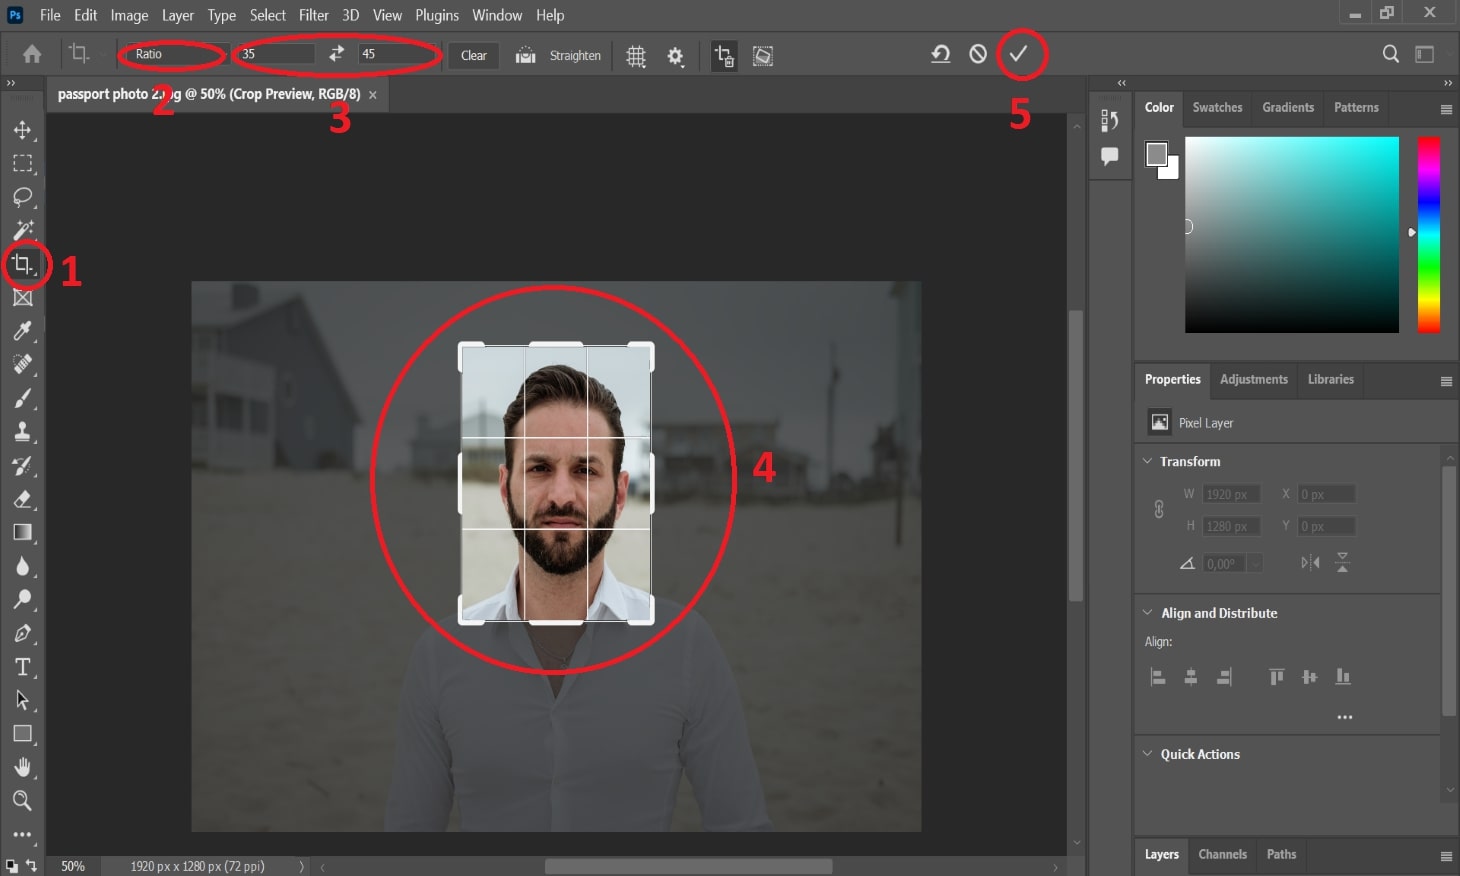
Go to File > New, select the photo you want to transform, and the crop tool in the toolbar on your left. Then pick Ratio in the drop-down menu above and set the proportions to 51 to 51 or 2 by 2 inches.
Fit the crop frame: Your head must fill in most of the picture. Make sure that your shoulders and upper chest are included in the image and click the checkmark at the crop selector above.
Step 2: Set the right size and background
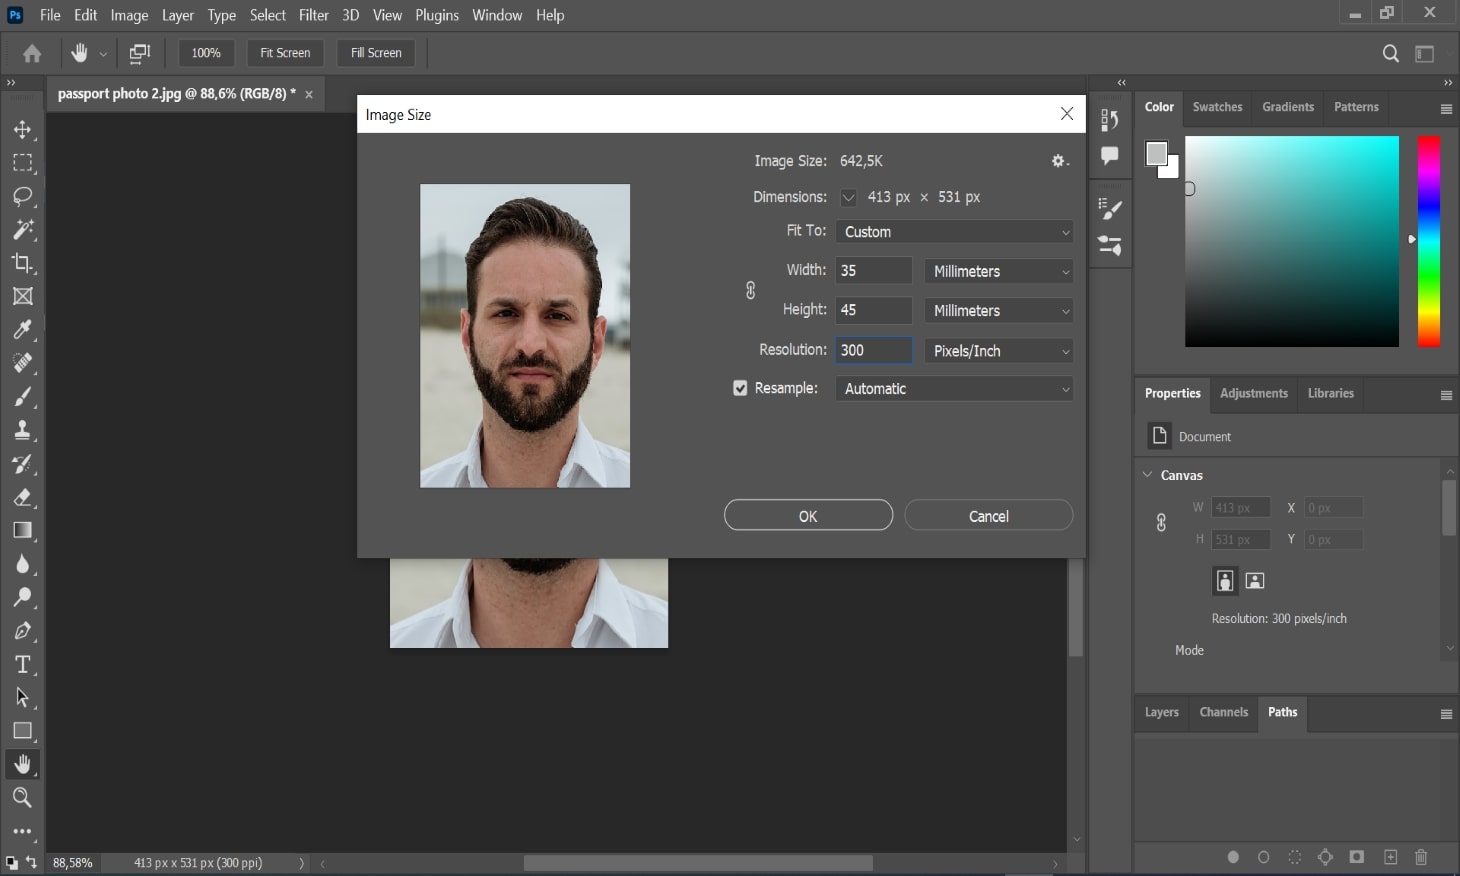
Go to Image > Size. Set width and height at 51 mm and 51 mm, and resolution to 300 pixels per inch. Click OK.
Get the Magic Wand. Press Ctrl+F and type in the name of the tool. Use the wand to highlight the background white. If it selects unwanted parts, exclude these areas by holding down Alt with the tool active and clicking on them. Delete the unwanted background.
In the new window, click on the Contents, select Color, and pick White. Choose Normal and 100% in the Mode and Opacity fields respectively.
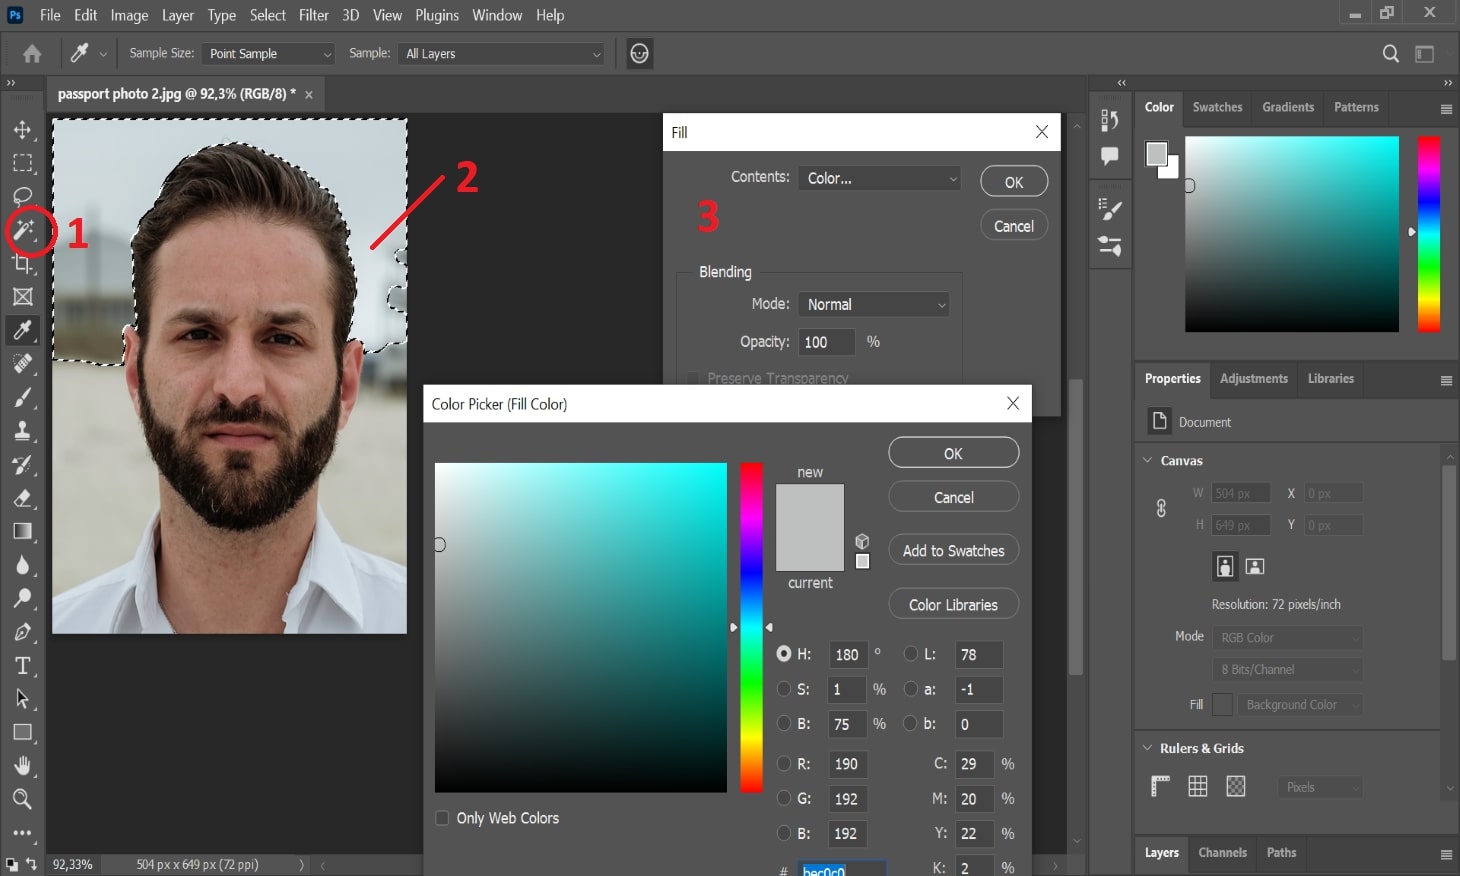
Deal with any missed spots using the brush tool. You’ll get less work involved if your hair is neatly styled. Alternatively, zoom in and pick off the areas where your hair is standing out.
Step 3: Photoshop passport photo and printable template
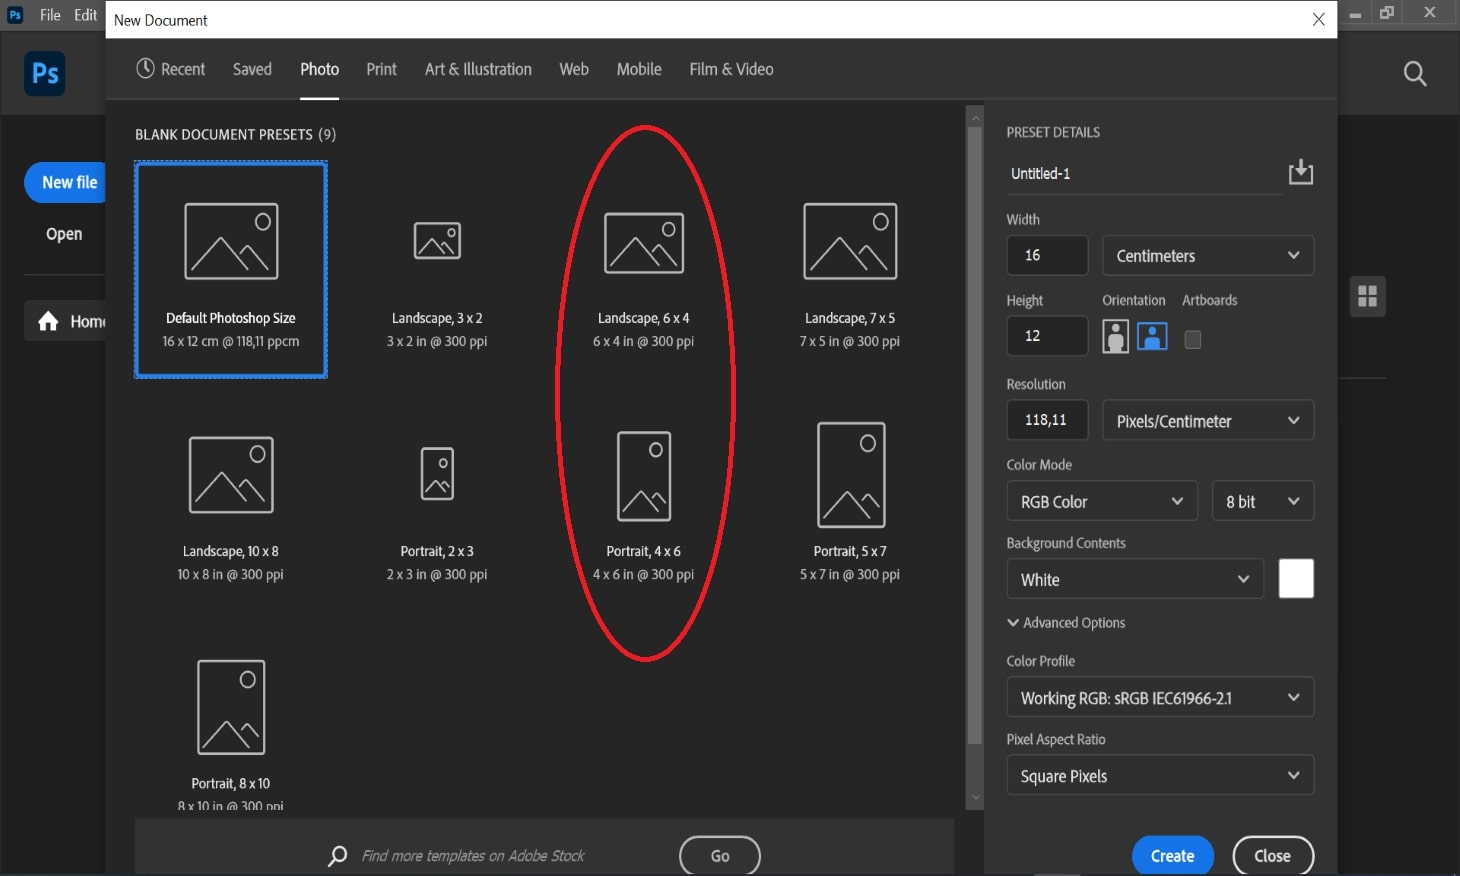
Now choose File > New > New Document. Select the Photo tab, and pick the canvas size Landscape preset, Portrait, or four by six inches. Hit Create.
Now, return to the tab containing your photo. Press Ctrl + A and select the entire picture. Copy it with Ctrl + C. Swap to the new tab and press Ctrl + V to paste the passport photo template into Photoshop.
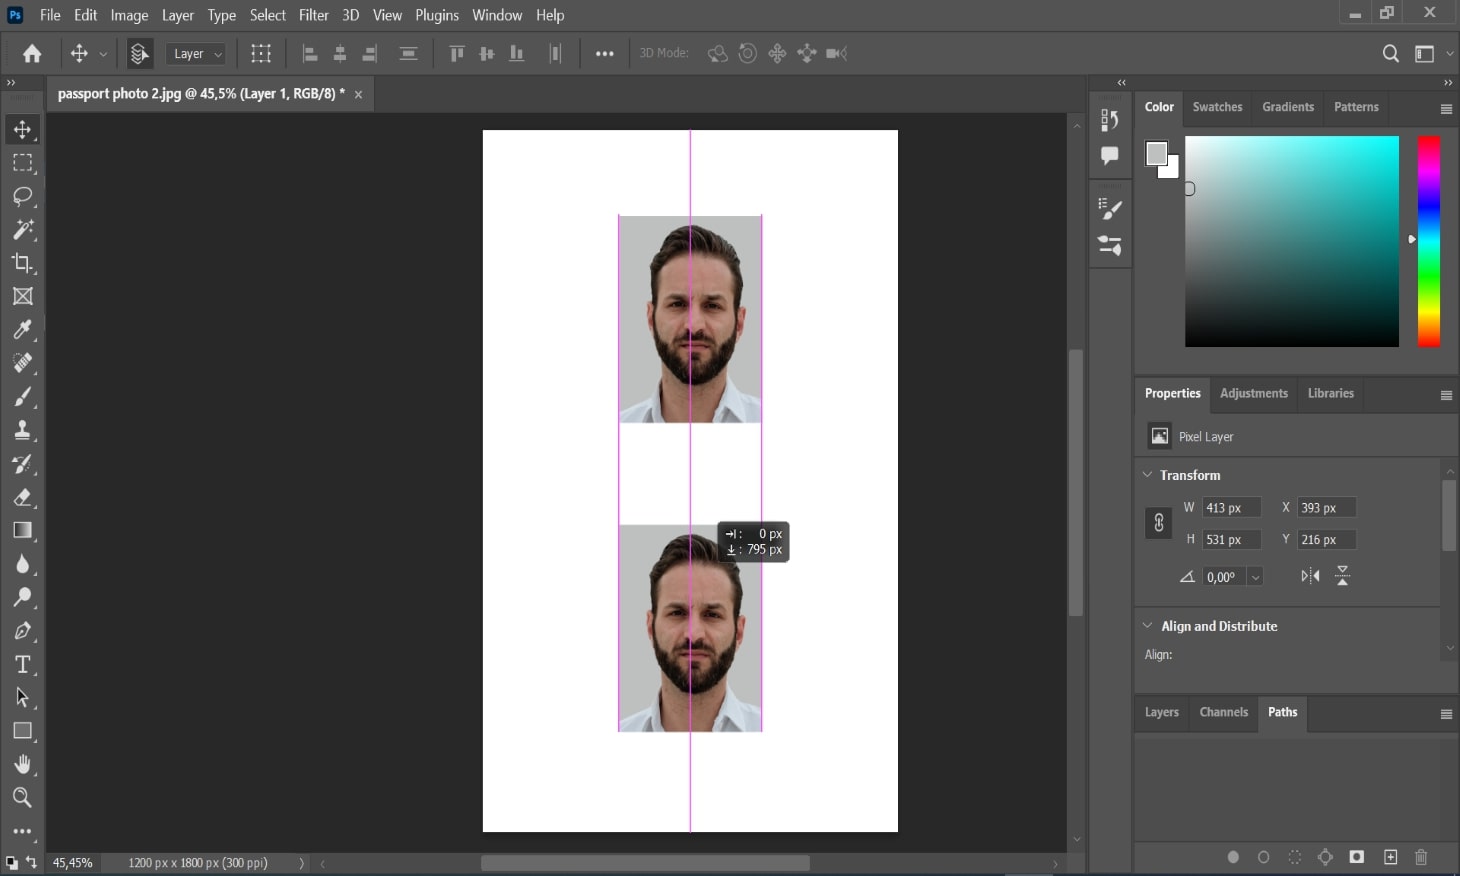
It can accommodate 2 or 4 images safely. Adjust them with no border. You’ll cut the photos easily when you print the passport photo template after Photoshop editing.
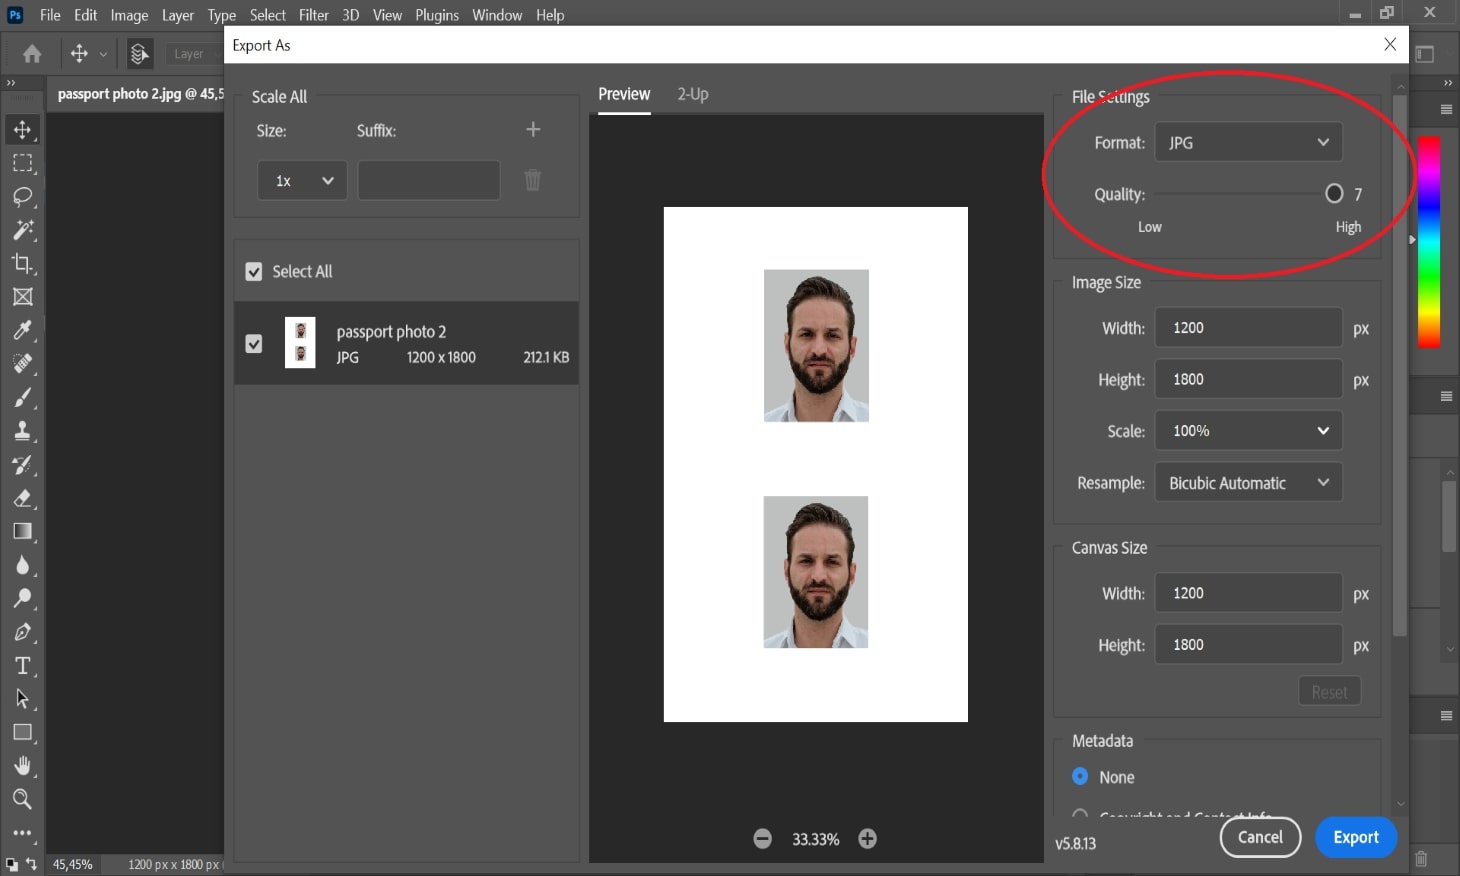
Go to File > Export > Export as JPG format. Click Export and save the JPG on your hard drive or flash card. Print the file at a photo lab or at home with your photo printer on glossy or matte photo paper.
FAQ
How to make a passport picture in Photoshop?
Follow our step-by-step instructions for passport photo creation in Photoshop to get a suitable template for print. Or use the online service that will make it all for you correctly in just a few seconds.
How to make passport-size photo in Photoshop CS4?
Make use of our small tutorial guides in the article. Get the job done in 3 easy steps: crop your passport photo in Photoshop(1), set the right size and background (2), and photoshop passport photo and printable template (3). It’s a great example of how you can use the software for your purpose.