How To Resize Photo To Passport Size
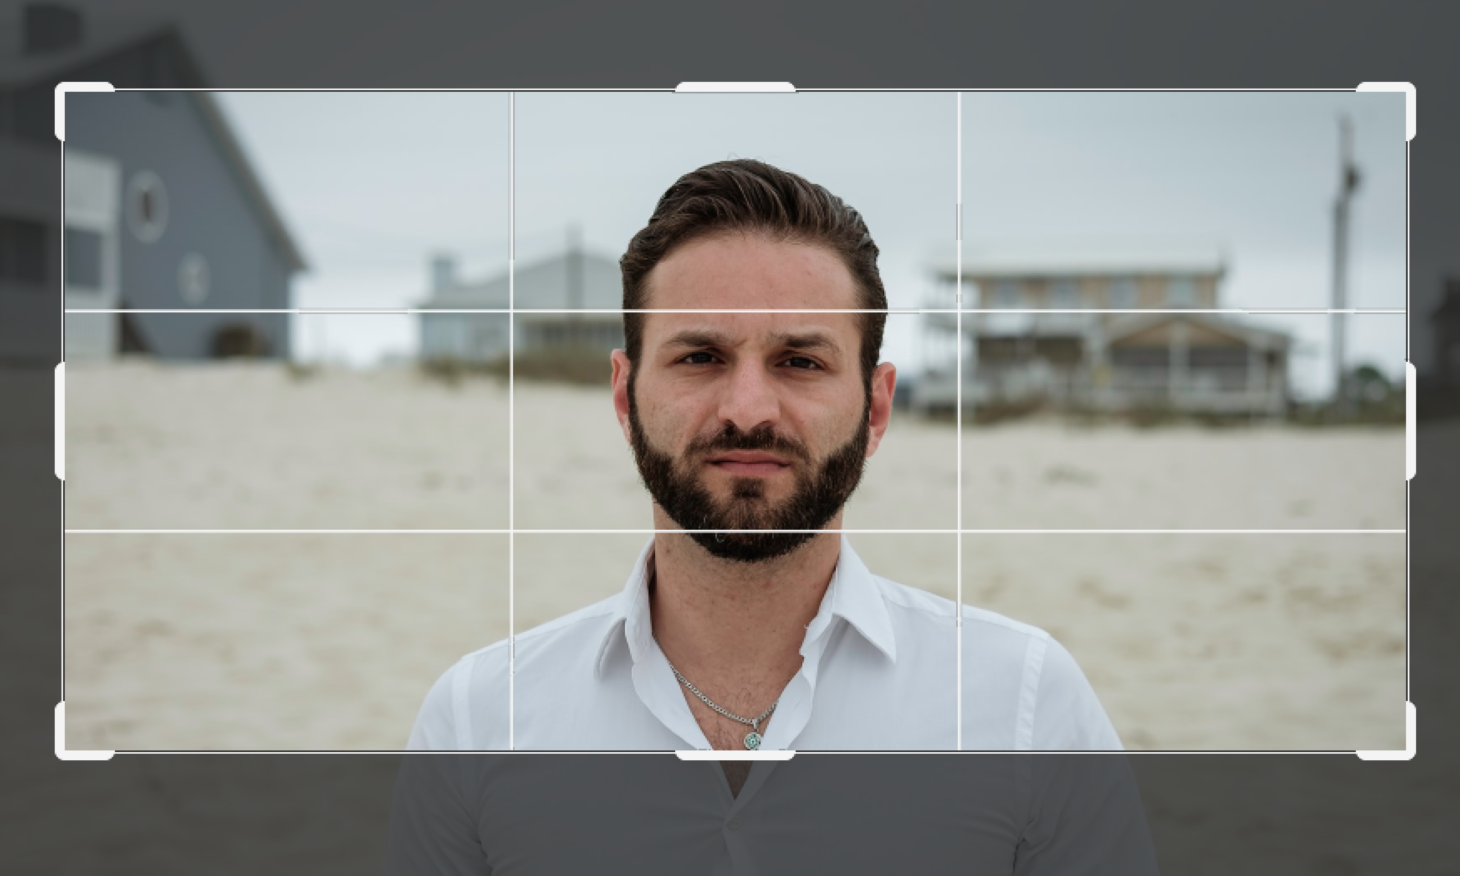
In case you’re planning a trip abroad, you may also need to renew your travel document (or get one for the first time), and, accordingly, update the picture in it.
And for some, taking a UK passport photo or any other headshot for official documents is an utter headache. Not only do you have to look for a place where to get it, but you also have to make sure that you look more or less pleasant in the resulting picture (after all, you’ll be stuck with it for the next 10 years).
Thankfully, there’s a way around this potential predicament: if you’ve already got a lovely digital snapshot, you can resize it to the correct passport photo size and avoid most of the hassle. Let’s find out how to do it in no time!
Contents
Can You Resize Any Image You Want?
First of all, make sure the image file meets the following criteria applied to a passport-size photo: it has to be a coloured high-definition picture with you in clear focus (also, make sure you don’t have the red-eye effect).
As for your position and appearance, you must be looking straight at the camera with a plain facial expression and your eyes fully opened.
Also, nothing must cover any part of your face (even your hair) and there can’t be any shadows on you. Glasses are allowed for medical purposes only, and so are head coverings (which can also be worn for religious reasons, however).
If your photo meets all these requirements, you can go on and crop it! At this point, you basically have two options: either do it with some photo editing software or use one of the various online tools.
Resize Photo For Passport With Graphics Editors
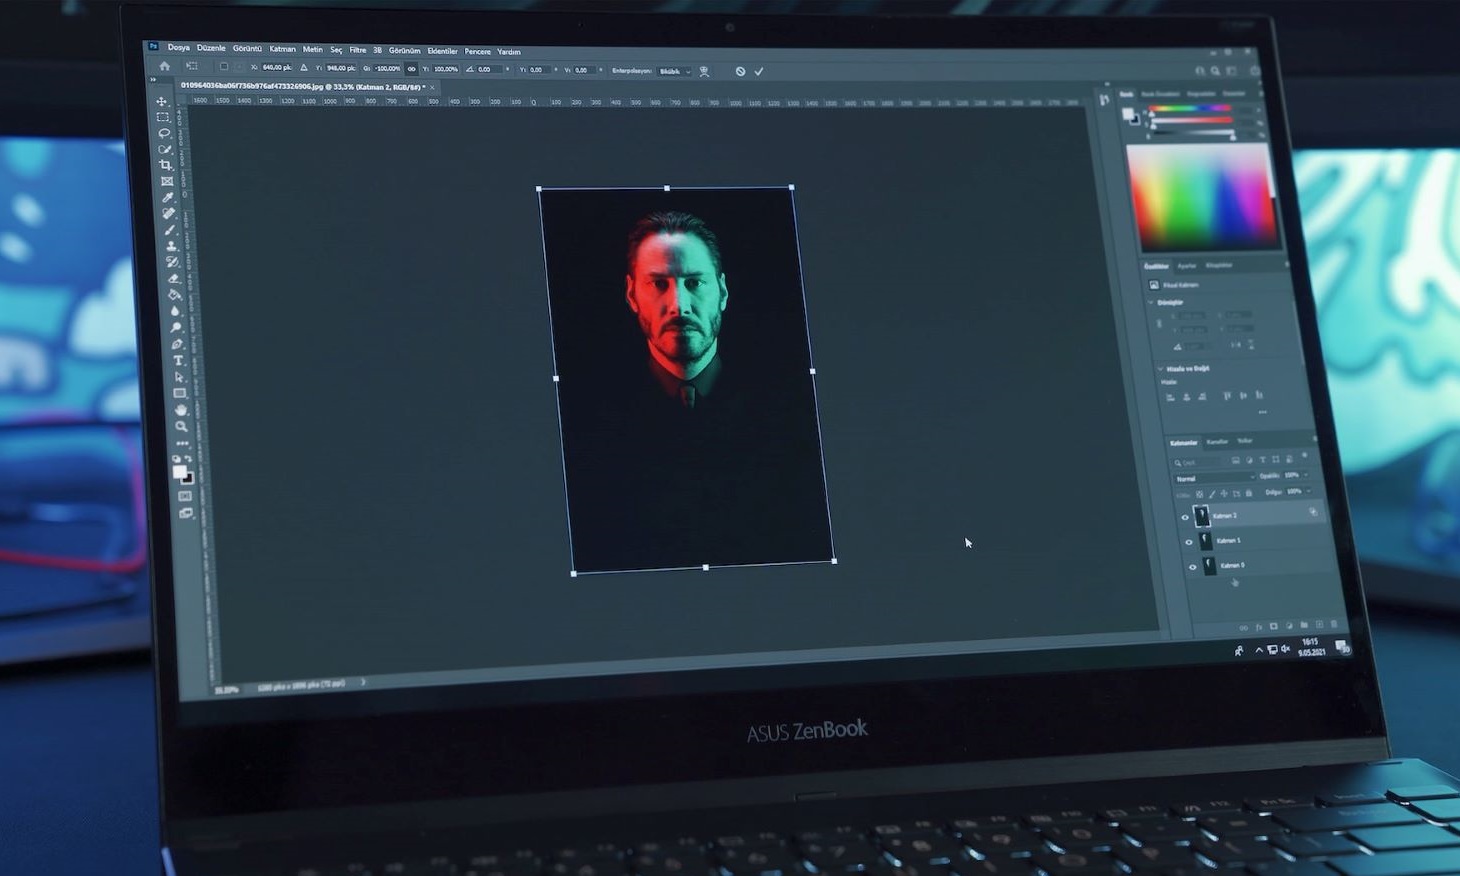
Now, if you were hoping to make do with an in-built image-editing tool like Paint, we have to break it to you: this way of cropping is fraught with difficulties, as you can’t do it in a single click automatically.
To be fair, it is possible to crop photo to passport size in Microsoft Paint, but in order to do it, you’ll have to painstakingly drag the selection tool frame to make sure the selected area (with your head and shoulders) is of the compliant proportions. It’s just immensely time-consuming and not worth it.
But it’s not all lost: whether you’re on Windows or Mac, you can resize images on your computer in Adobe Photoshop!
Please note that in case your picture’s background is not plain light grey, it’s not suitable: you’ll have to change it, too.
How Do I Resize a Photo To Passport Size In Photoshop?
Step 1
Open your picture in the editor: launch the program, then go to File > Open.
Step 2
Select the cropping tool in the toolbar on the left.
Step 3
In the fields that just popped up above, pick Ratio, then enter 35 and 45 – these are the proportions of compliant British passport-size photos.
Step 4
Resize the cropping frame (click and hold on one of its corners, then drag) and position it in such a way that your head and, partly, your shoulders and upper chest can be seen (according to the official requirements, your head must measure 29-34mm from the top to your chin; use that as your reference).
Step 5
Once you’ve adjusted the frame correctly, hit the checkmark above to confirm the resize.
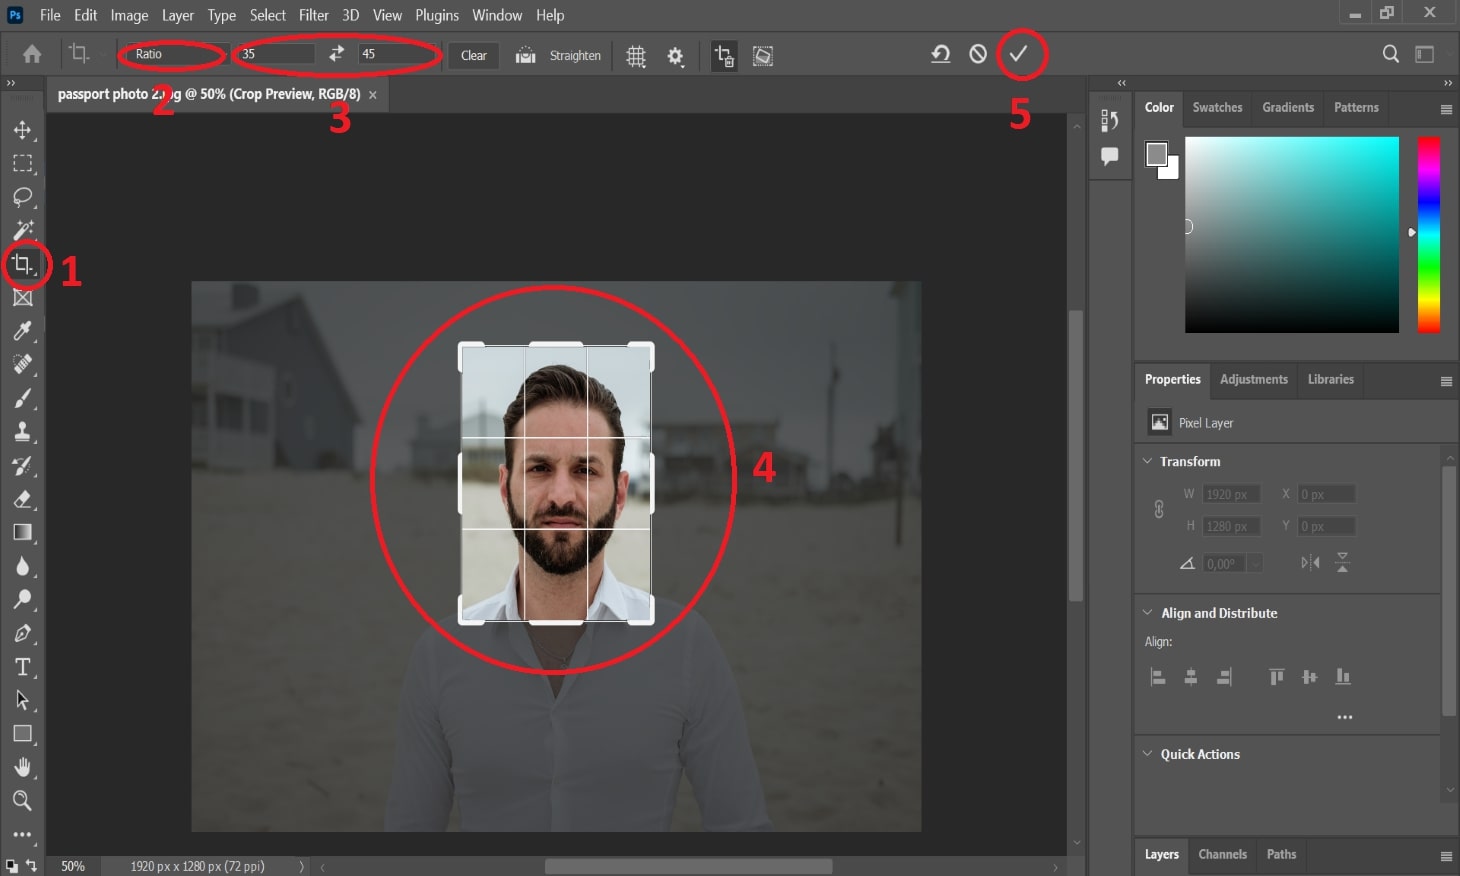
Now that you’ve got the proportions right, it’s time to make sure the picture has the exact size you need.
Step 6
Go to Image > Size.
Step 7
Set the width and height to millimetres, then enter 35mm and 45mm in the respective fields (remember to click on the chain to make sure the width-height ratio isn’t constrained).
Step 8
Set the resolution to pixels per inch and enter 300 in the field. Hit OK.
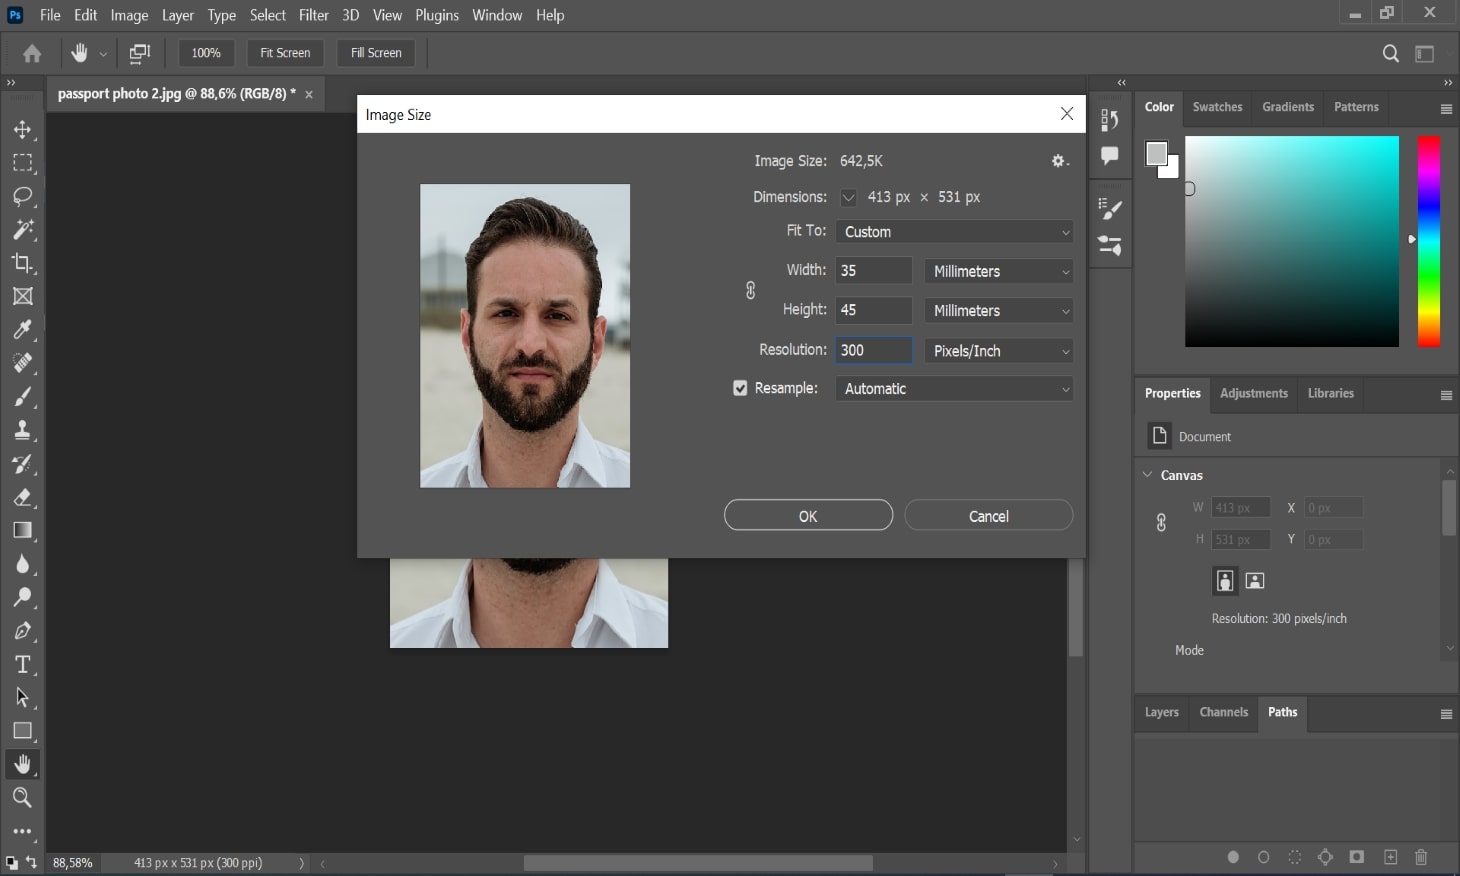
Step 9
Almost there! All that’s left is to go to File > Save As… and export the file to any convenient location on your computer. When selecting the format, we recommend you choose JPG over PNG, as the former will have a smaller file size.
That’s it, you’ve resized your usual snapshot to the passport photo size! However, there’s one important thing left: if your photo has a backdrop whose colour is something other than light grey (or off-white, if put differently), you’ll have to change background, and this will take some editing, too.
Resizing In Editing Programs: Pros & Cons
Pros
- High precision: you can set the exact size in mm and pixels
- No need for Internet connection (as a rule)
Cons
- Such editing software is mostly paid
- If your background isn’t neutral, you also have to remove it by yourself
- A lot of other functions that may confuse you
Resize Passport Photo With Online Tools
Luckily, you don’t have to fuss around with a clumsy editor that’s got a thousand functions irrelevant to your goal. The quickest and safest (rules-wise) way to cut and crop a photo to passport size online is to use one of the tools designed for that specific purpose in the first place!
The options to resize photos available on the market are quite numerous. Some online passport picture tools are very quick and fairly easy to use but cost way too much, while others are free but have unfriendly interfaces or working algorithms that resize images somewhat poorly (and still others inexplicably combine the worst of the first two).
Our passport-resizing tool will resize any photo to passport size easily and quickly! A couple of minutes is all you need to turn your usual picture into a compliant headshot ready to print or submit via the government website!
How Do I Resize Photo To Passport Size Online?
Before we begin: if you’re on PC, make sure to have the snapshot you want to resize on your hard drive. In case you’re on mobile, you can either do the same (have the image file ready in your storage) or just take the picture on the spot once you’ve accessed our tool.
Step 1
Open photobooth.online/en-gb/british-passport-photo in your browser.
Step 2
If you already have a snapshot to process, click or tap Upload Photo, then choose the image file. In case you want to take a new picture, tap Take Photo (available on mobile only) and take it as you usually do (remember the guidelines on passport-size photos).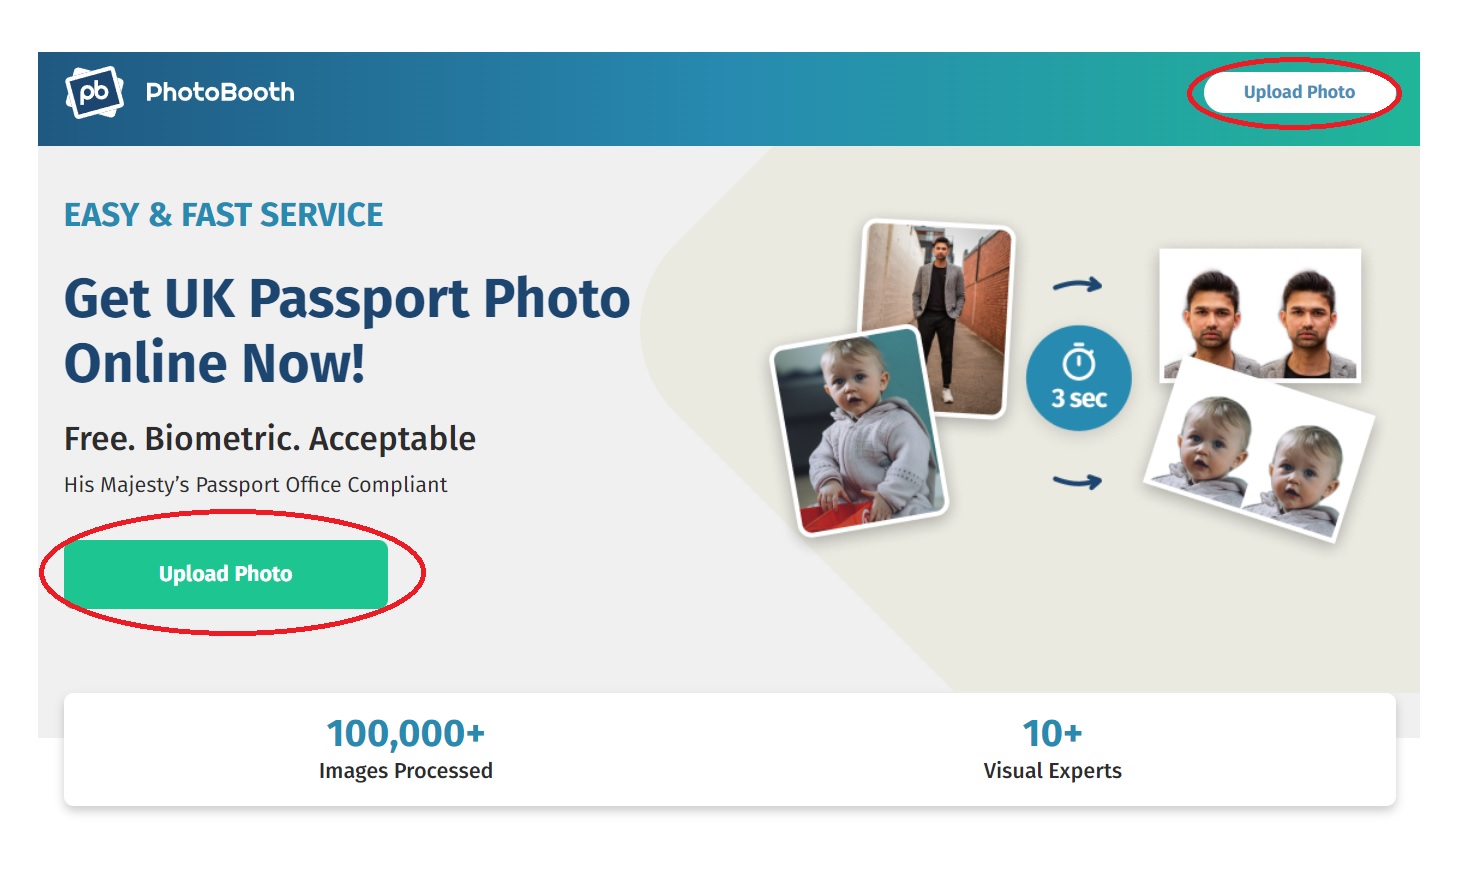
Step 3
Wait several seconds for our service to resize, adjust and process your snapshot. Additionally, our service has this off-white background enhancement feature – it makes your backdrop light grey.

Step 4
As soon as the processing is complete, you’ll get to the page where you can check out the resulting picture and make sure it complies with the general standards and won’t be rejected by His Majesty’s Passport Office. If you’re happy with the result, you can download either the resized image alone (you can use it for online submission) or the printable template with two passport photos in it (use this one if you want to print).

That was fast, right? What may be even more important, it was very simple. To top it all off, there’s this extremely useful off-white background enhancement feature. As opposed to graphics editing tools, PhotoBooth Online can automatically resize your photo to passport size in a matter of minutes, thus helping you save time and effort!
Resizing With PhotoBooth Online: Pros & Cons
Pros:
- Available both on PC and mobile (and also tablets)
- Simple and user-friendly interface
- Fast processing: the whole thing takes minutes
- No need to study the requirements beforehand
Cons:
- Internet connection is required
Closing Thoughts On Passport Photo Resize
That pretty much sums it up: if you follow our step-by-step instructions, there should be no trouble whatsoever. In case you choose our tool to do the passport resizing, please note that PhotoBooth Online can make photos for other documents, too.
For example, you can get a Tesco passport photo online without leaving home! Try it for free: PhotoBooth Online is always there to make you a perfect biometric picture!