
Photoshop Passport Photo in 4 Steps

Renewing your travel document can be expensive—especially when it comes to passport photos. Thankfully, you can save some money and photoshop your passport photo!
📋 Quick Answer
To create a passport photo in Photoshop, crop your image to a 35:45 ratio, set the size to 35×45 mm at 300 ppi, and make the background plain and light-coloured. For printing, place 4 copies of the photoshopped image on a 4×6-inch (10×15 cm) template.
While you can create a passport photo in Photoshop yourself, getting it accepted is another story. Even small mistakes in size, background, or positioning can lead to rejection.
Below, we’ll show you how to create a compliant 35×45 photo step by step – and a much faster way to get the same result automatically.
💡 Don’t want to edit in Photoshop? Skip the manual steps and create a compliant passport photo automatically in under a minute. Upload a regular picture, and we’ll turn it into a passport-ready photo.
Contents
Creating a Passport-Size Photo in Photoshop
Using Photoshop can be quicker than visiting a photo booth – but only if you know exactly what you’re doing.
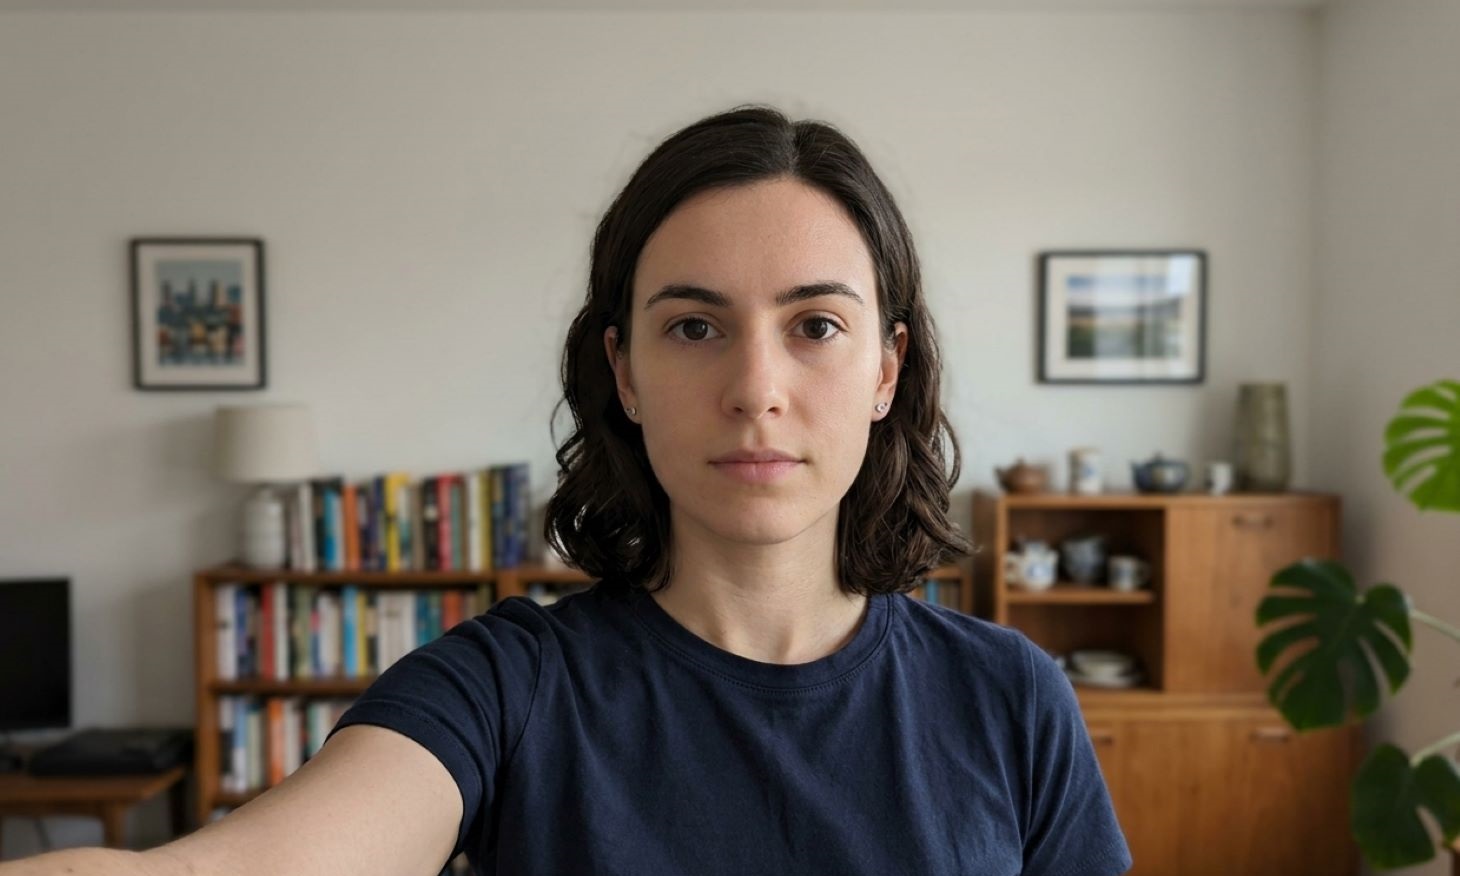
Step 1: Take a Picture and Open It in Photoshop
You can take the photo yourself or ask someone to help. In any case, your photo must be recent (taken within the last month) and not scanned.
When taking the picture, make sure:
- You look straight at the camera with a neutral expression.
- Your face is clearly visible and evenly lit.
- Your head and shoulders are fully in frame.
- Your hair is neat (stray hairs can complicate editing later).
Once you’ve taken your picture, copy it to your computer, then launch Photoshop and open the photo via File > Open.
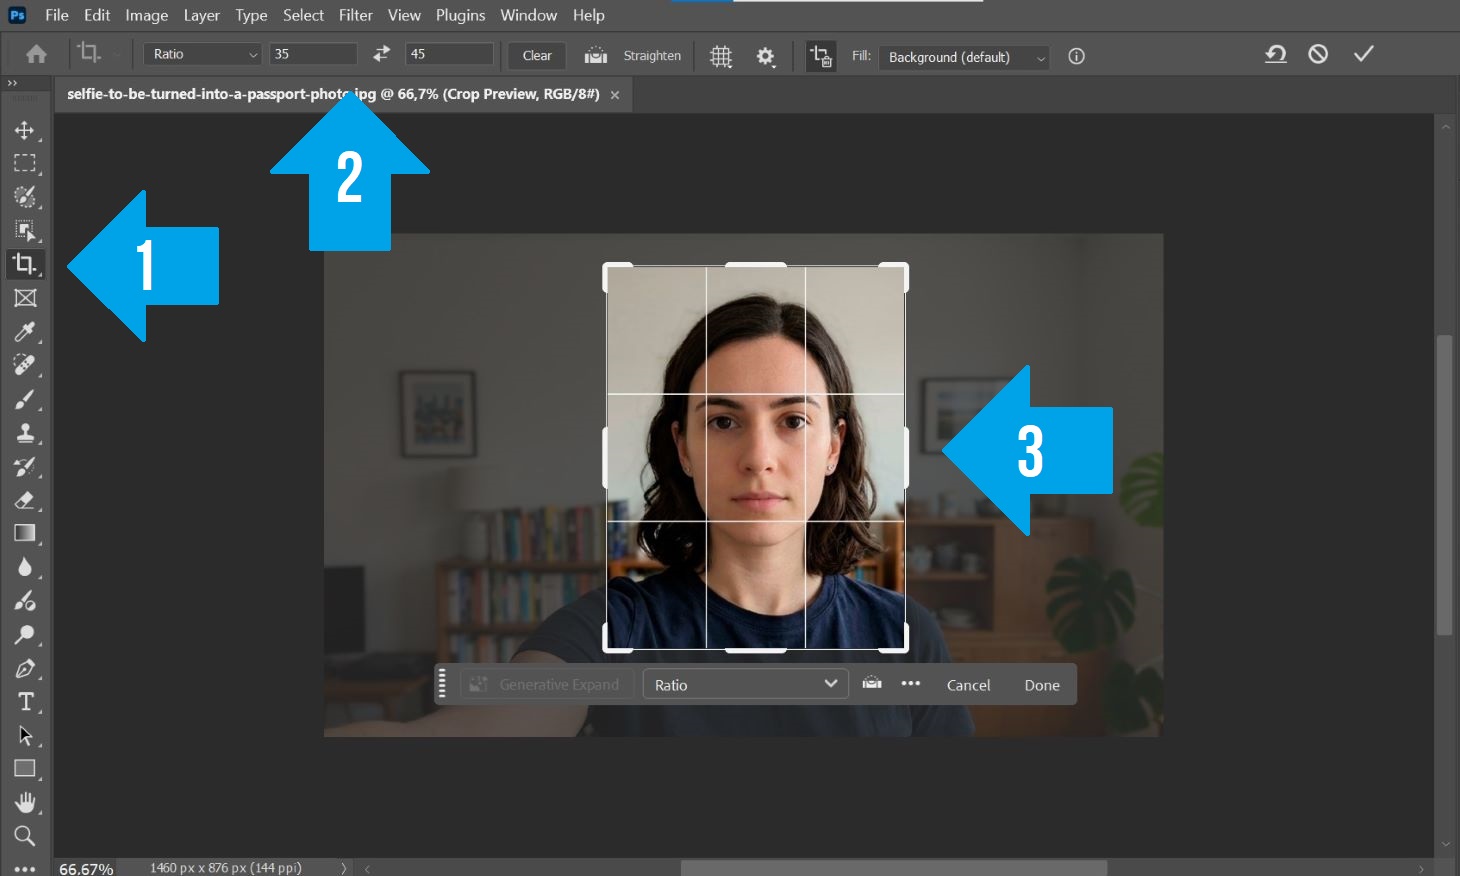
Step 2: Crop the Image to the 35×45 Ratio
Select the Crop Tool and set the aspect ratio to 35:45. Then, adjust the frame so your head takes up most of the image.
⚠️ Attention: Make sure there’s some space above your head and your upper shoulders are visible.
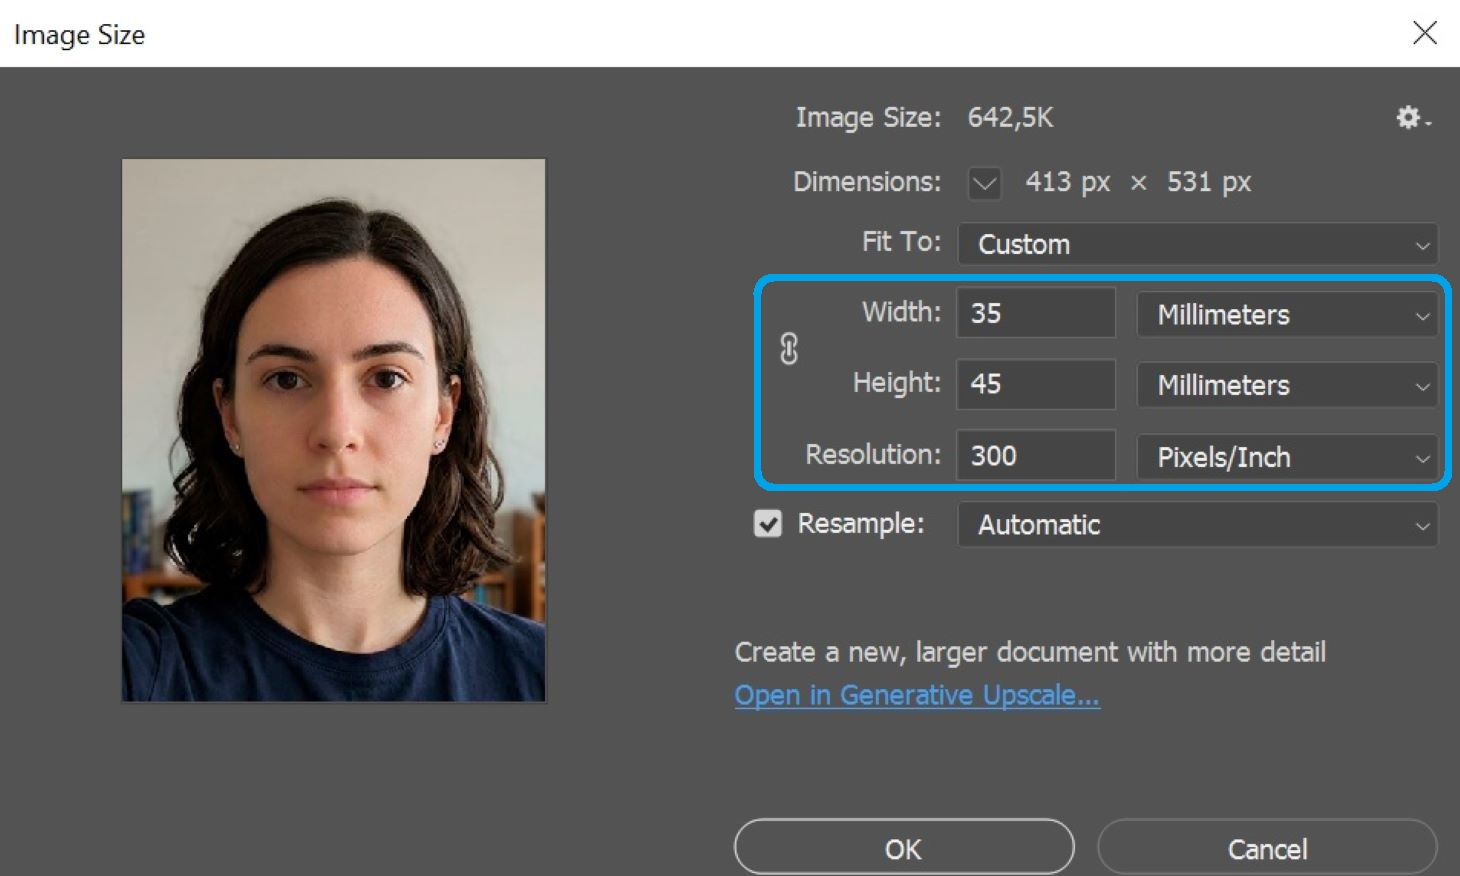
Step 3: Set the Correct Size and Resolution
Go to Image > Image Size. Unpair the width and height fields (by clicking on the chain icon) – then set the width to 35 mm, height to 45 mm, and resolution to 300 pixels per inch.
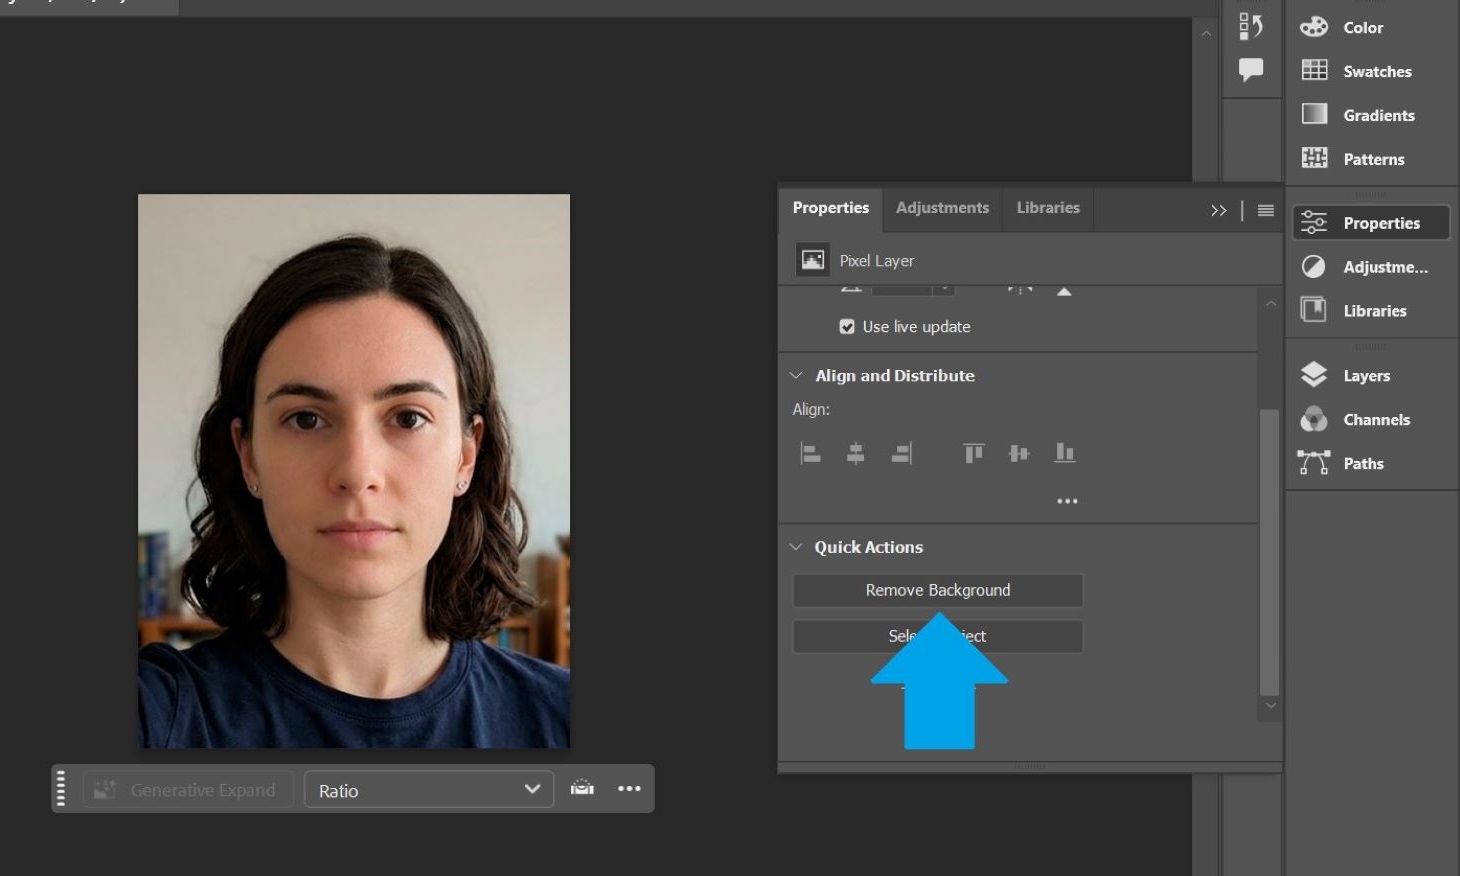
Step 4: Remove the Background
Instead of manually selecting and erasing the background with the Magic Wand, you can use Photoshop’s automatic removal tool.
First, open Window > Layers and unlock your image layer by clicking the lock icon.
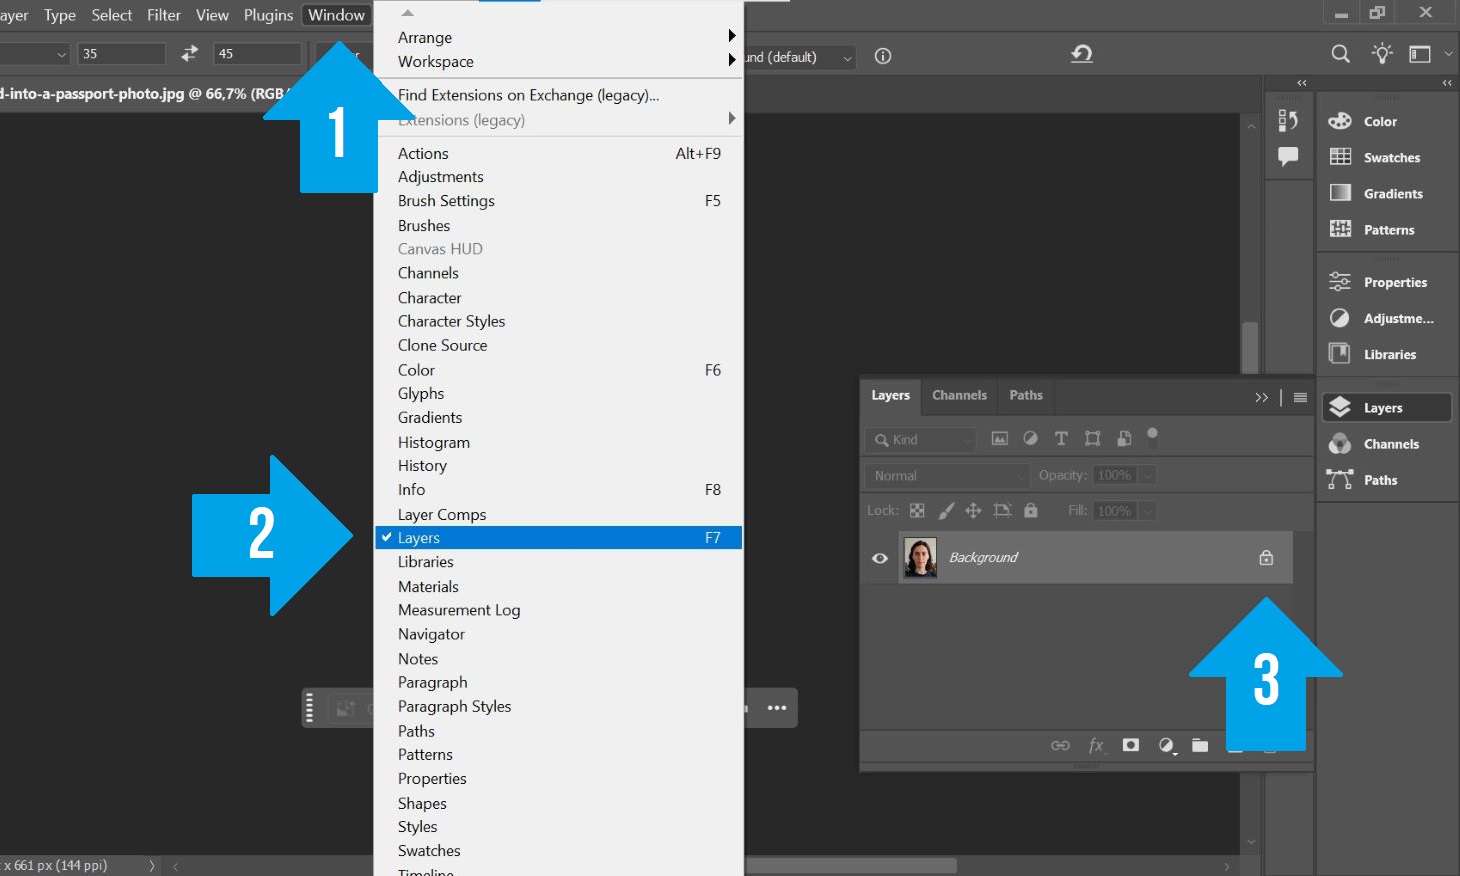
Then, go to Window > Properties. In the Quick Actions section, click Remove Background – this will automatically detect and remove the background in seconds.
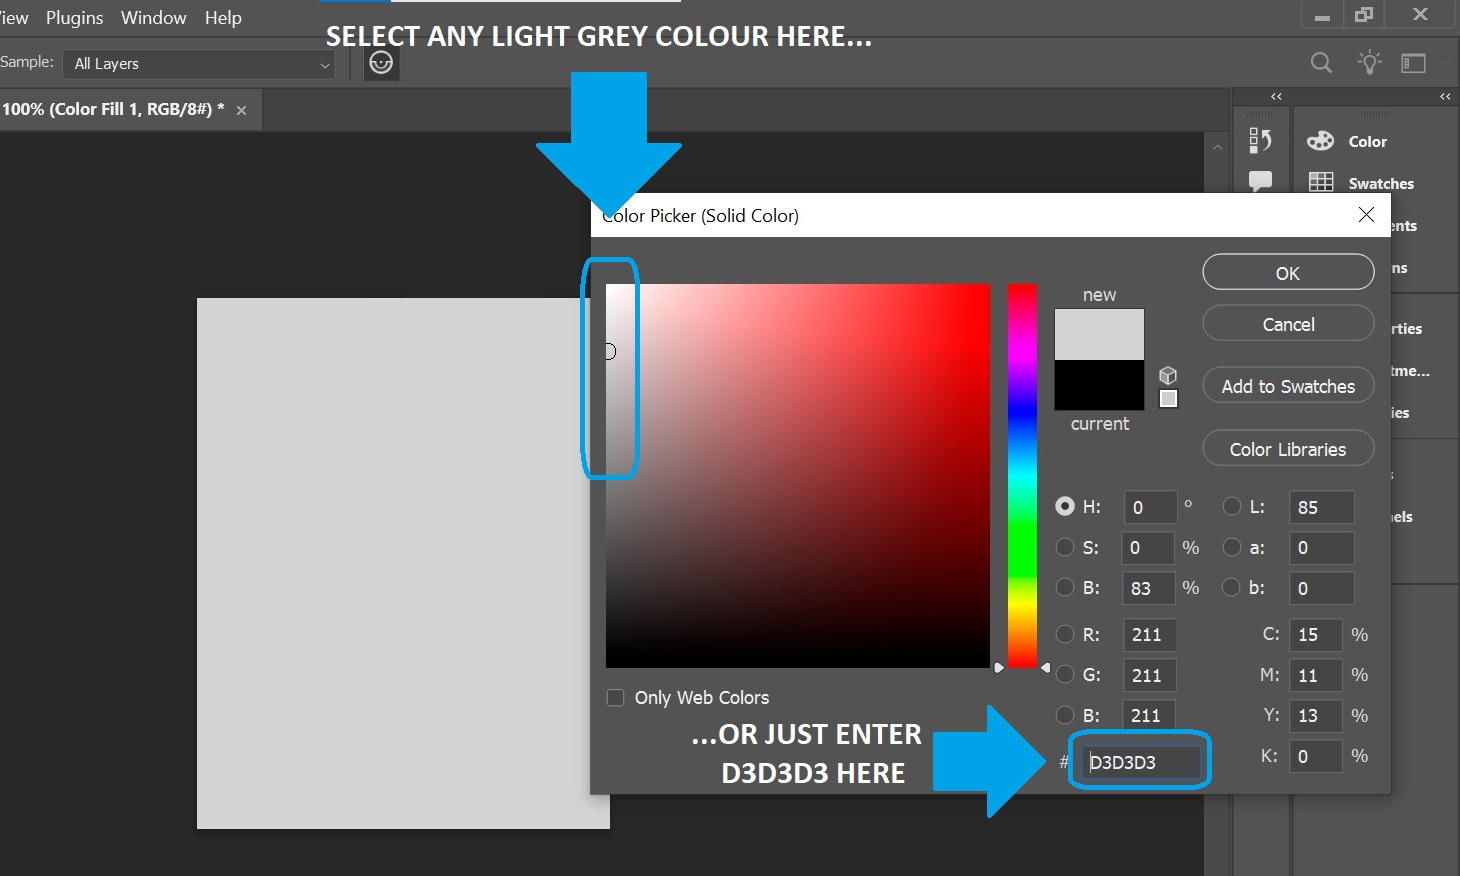
Next, create a new background layer by going to Layer > New Fill Layer > Solid Color.
In the first window that appears, just click OK, then choose a light grey or white color (for example, #D3D3D3) and confirm.
Open the Layers panel again and drag the new colour layer below your photo.
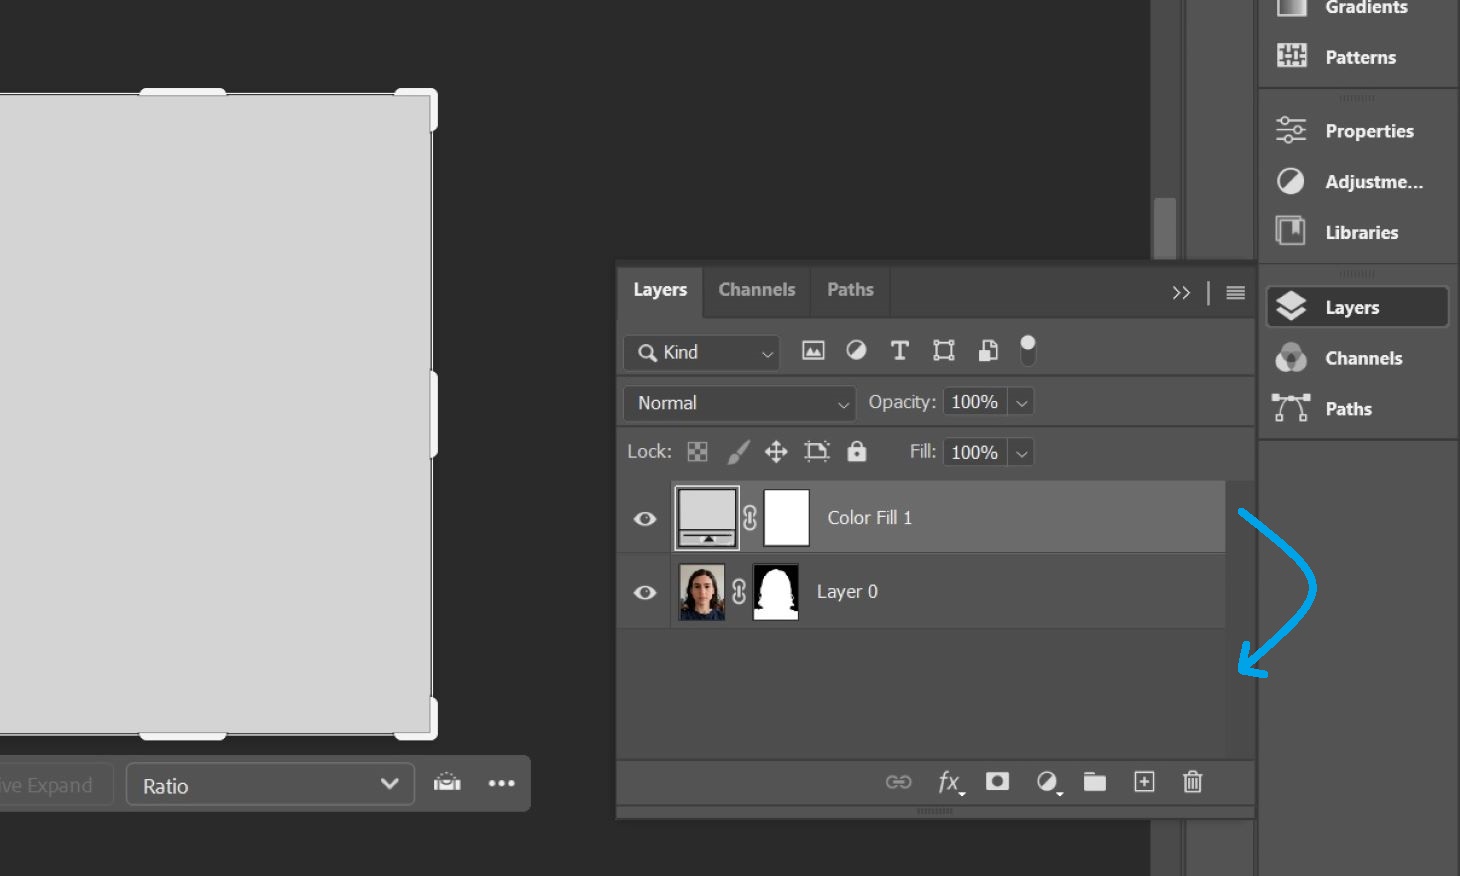
Once the colour layer is moved below, your image will come forward – and it will have a clean, uniform background now.
Finally, click on any layer with the right mouse button and select Merge Visible to combine everything into a single image. Save this image in the JPEG format using File > Save As.

✅ That’s it, your passport photo is done and ready to use for your online application!
If you need to print it, see the 3-step guide below.
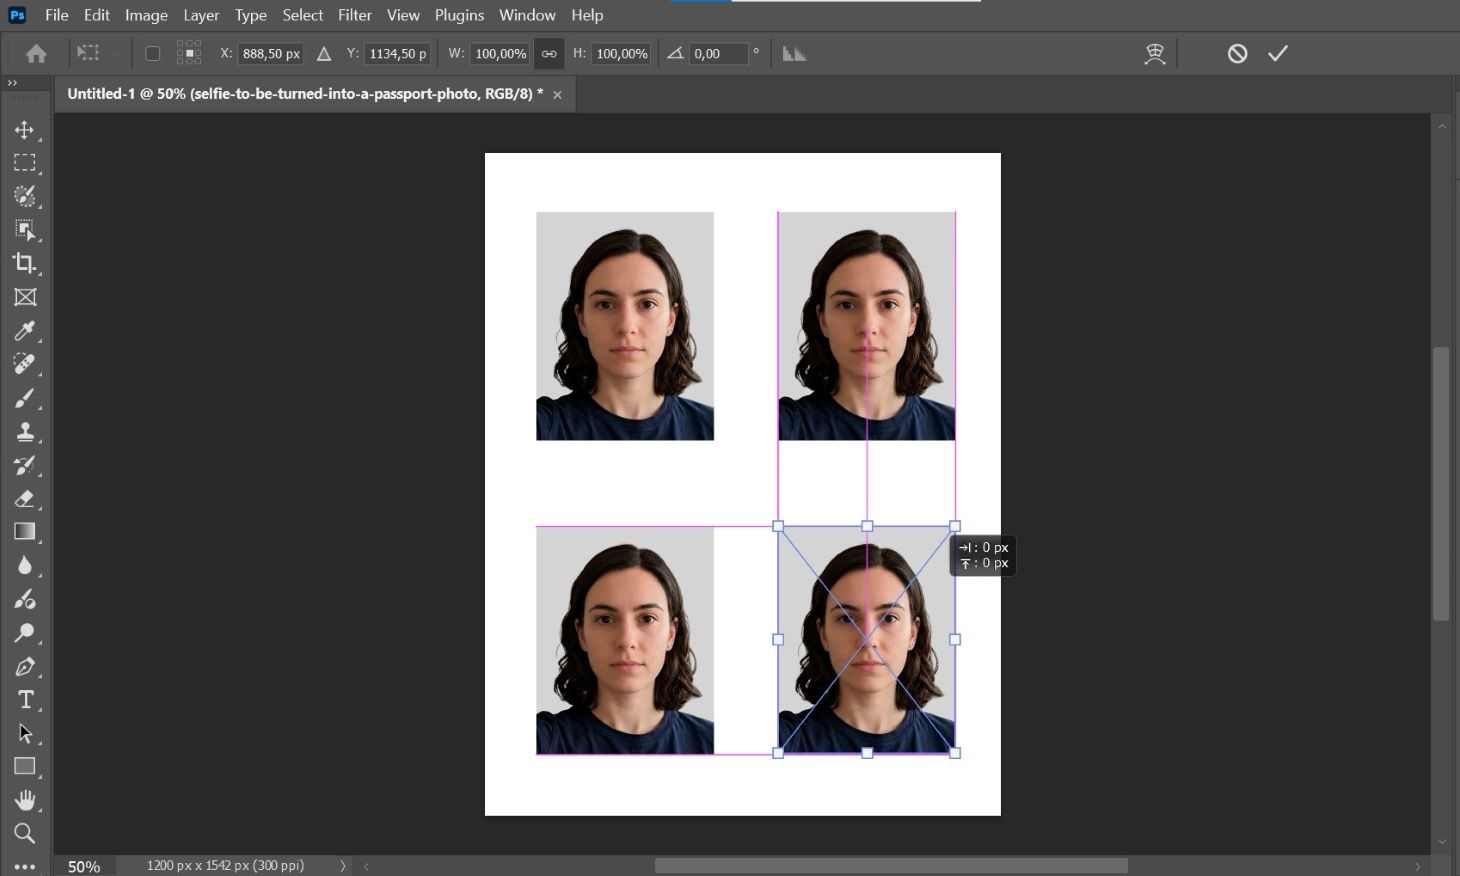
How to Create a Passport Photo Print Template in Photoshop
If you want to print your passport photo at a store or your home printer, you’ll need to place several copies onto a standard 6×4″ template.
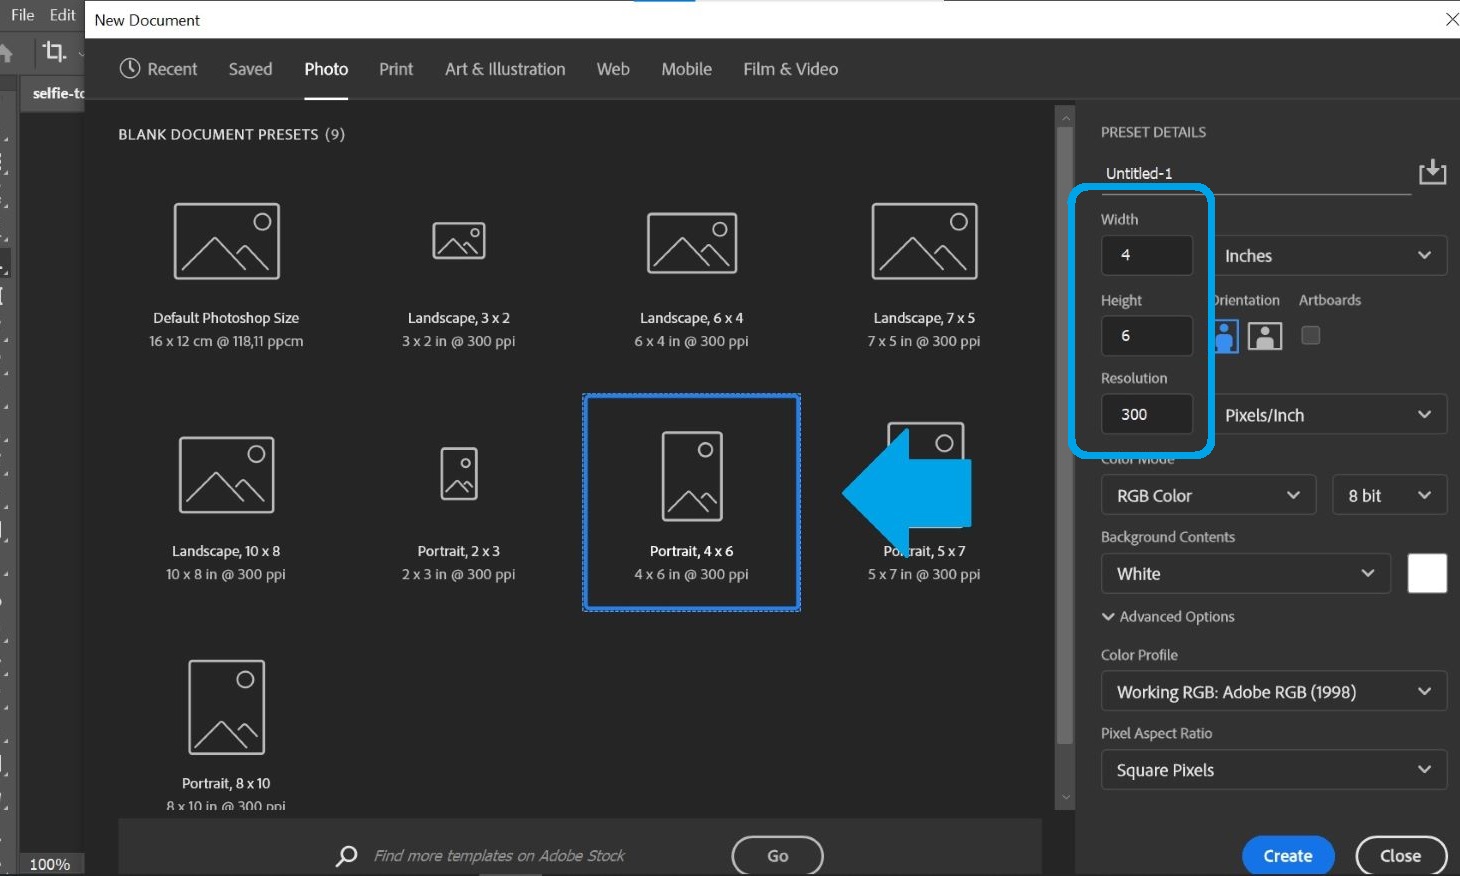
Step 1: Create a New Document
Go to File > New and set the size to 6 x 4 inches with a resolution of 300 ppi.
Step 2: Add Your Passport Photo
Select File > Place Embedded… and insert your saved passport photo onto the canvas.
Duplicate the image until you have 4 copies on the page. Leave small gaps between them so they can be cut out easily.
Step 3: Export the Template
Open the Layers panel, then merge all layers into one by right-clicking on one of them and selecting Merge Visible.
Go to File > Save As and export the final layout as a JPG image file (keep the highest quality possible).
Your template is now ready to print in any photo shop.
How to Get a Passport-Size Photo Without Photoshop
While Photoshop works, it’s time-consuming and error-prone. As of 2026, many applications are rejected due to small technical issues that are hard to spot manually.
Instead, you can use PhotoBooth Online to automatically create a compliant passport photo in under a minute.

1
Take and Upload a Regular Picture
Take a regular photo with good lighting and a neutral expression – upload it using the button below.
2
Get an Instant Preview
In seconds, your image is cropped, adjusted, and checked against official requirements. You can retake it as many times as needed.
3
Download Your Passport Photo
You’ll receive a print-ready template and digital photo – fully compliant and double-checked.
✅ Stop worrying about rejection. While Photoshop gives you control, PhotoBooth Online gives you a 100% compliance guarantee, just like with a Tesco passport photo.
Ready to skip the manual work? Tap the button at the bottom of your screen to upload and auto-edit your photo with an instant preview.
Written by: PhotoBooth Online Team
Updated: 27/03/26
Passport Photo Photoshop: Common Questions
Can you Photoshop your passport photo?
Yes, you can create a passport photo in Photoshop, but it must strictly follow official requirements. Even small errors in size, background, or positioning can lead to rejection, so accuracy is essential.
How do you create a passport-size photo in Photoshop?
To create a passport photo in Photoshop, upload your image, crop it to the correct ratio (35:45), adjust the resolution to 300 ppi, and replace the background with a plain light colour. Finally, export the image as a high-quality JPEG.
What is the passport photo size in Photoshop?
A standard passport photo size is 35 mm wide by 45 mm high. In Photoshop, you can achieve this by setting the correct crop ratio and ensuring proper head positioning within the frame.
What is the passport-size photo in pixels in Photoshop?
At 300 pixels per inch (ppi), a 35×45 mm passport photo equals approximately 413 x 531 pixels. Make sure your resolution is set correctly before exporting.
How do you create a passport photo template in Photoshop?
To create a print template, set up a new document at 6 x 4 inches with 300 ppi, then place and duplicate your passport photo to fit multiple copies on the page for printing.
How do you make a white background for a passport photo in Photoshop?
You can remove the background using Photoshop’s “Remove Background” tool, then add a new solid colour layer (usually white or light grey) behind your image to meet passport requirements.
How do you change a photo to passport size in Photoshop?
Use the Crop Tool with a 35:45 ratio, adjust framing so your head fits correctly, and set the resolution to 300 ppi. This converts a regular photo into passport size.
How do you print a passport photo in Photoshop?
Create a 6 x 4-inch document at 300 ppi, insert your passport photo, duplicate it to fill the page, then export the layout as a high-quality JPG for printing.
How can you print a passport-size photo without Photoshop?
You can use online tools that automatically format your image into a print-ready template – like PhotoBooth Online. Simply upload your photo, and PhotoBooth Online will generate a compliant layout ready for printing.